Linux | Network Manager | LAN & WLAN🔗
Tip
Configuration of WLAN’s profile settings is nearly identical. Security tab is called Wi-Fi Security and you additionaly need to choose WPA/WPA2 Enterprise in Security field.
PEAP authorization🔗
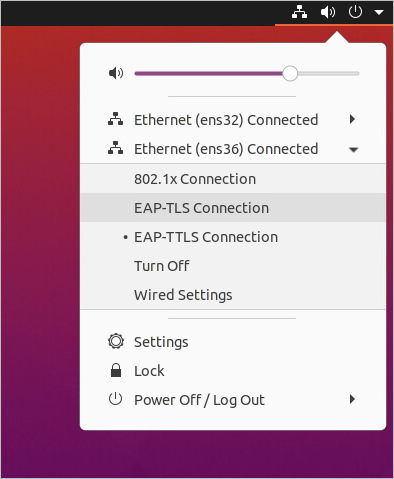
1.1. Open the settings and go to the Network tab.

1.2. Choose the connection you want to configure and click the gear icon next to it.
Info
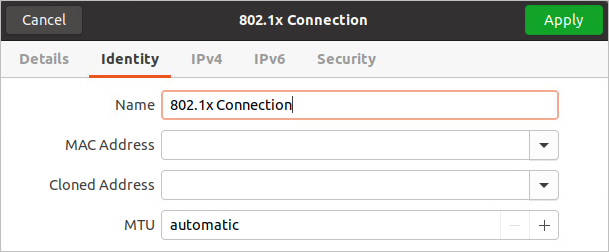
To create a new connection, click the little plus icon. By default, the** Identity **tab will open. When creating a new connection or modifying an existing one, you can give it a name.
1.3. Go to the Security tab.
1.4. Switch the 802.1x Security option.
1.5. Set the authentication method to Protected EAP (PEAP).
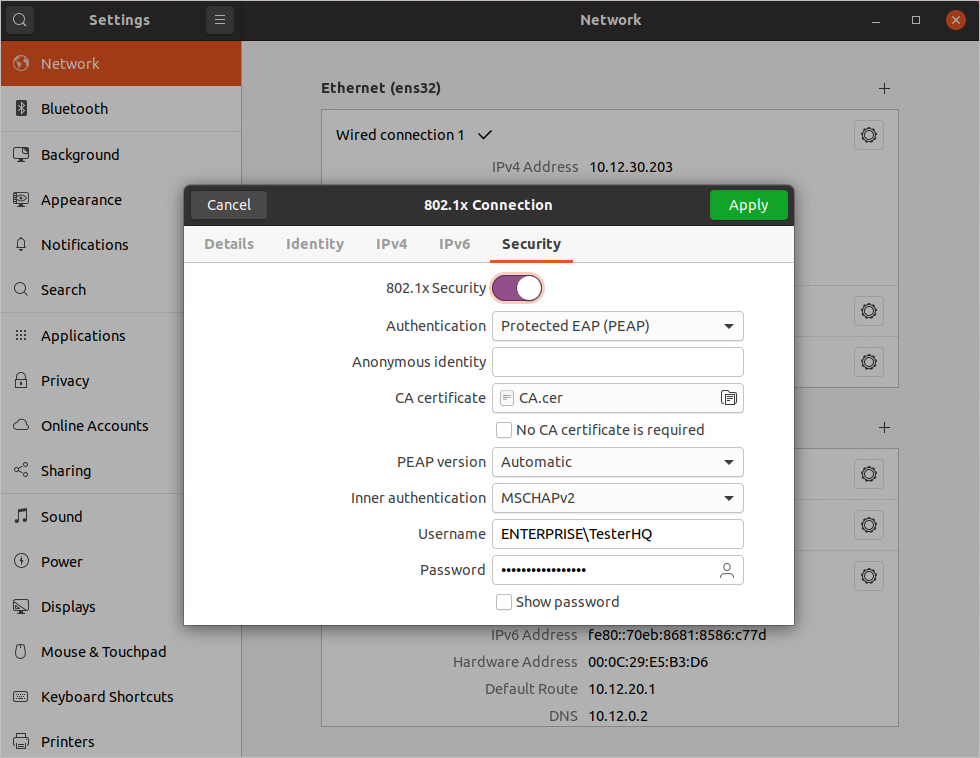
1.6. Complete the fields with your connection details. The Anonymous identity field is optional.
To increase security, adding a CA certificate is recommended.
1.7. In the Inner authentication field, select the MSCHAPv2 option. The MD5 option only works with local NACVIEW accounts.
1.8. Confirm with the Apply green button.
Info
You may need to enter your password again at the first time you connect.
EAP-TLS authorization🔗
2.1. Open the settings and go to the Network tab.

2.2. Select the connection you want to configure and click the gear icon next to it.
2.3. Go to the Security tab.
2.4. Enable the 802.1x Security option.
2.5. Set the authentication method to TLS.
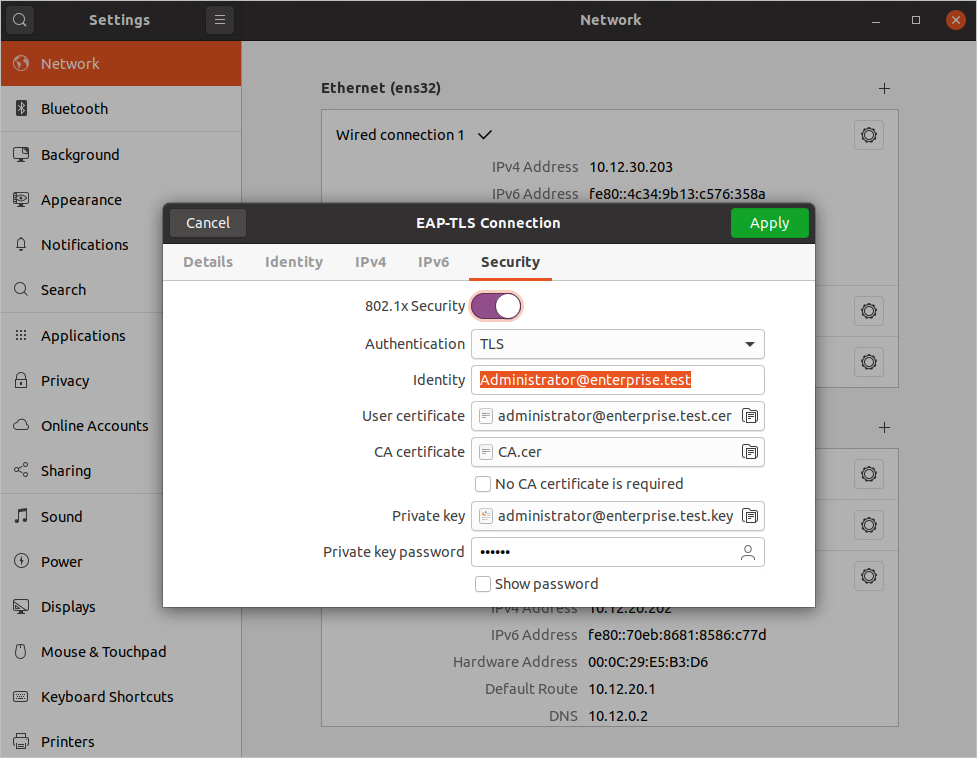
2.6. Complete the fields with connection data and appropriate certificates and keys.
Info
To increase security, it is advisable to add a CA certificate.
Info
The Ubuntu 20.04 LTS default supplicant does not allow the use of a private key without a password. The CN or UPN provided while creating the certificate must match the username that has been provided in the Identity field.
2.7. Confirm with the Apply green button.
Info
You may need to enter your password again the first time you connect.
EAP-TTLS authorization🔗
3.1. Open the settings and go to the Network tab.

3.2. Select the connection you want to configure and click the gear icon next to it.
3.3. Go to the Security tab.
3.4. Enable the 802.1x Security.
3.5. Set the authentication method to Tunneled TLS.
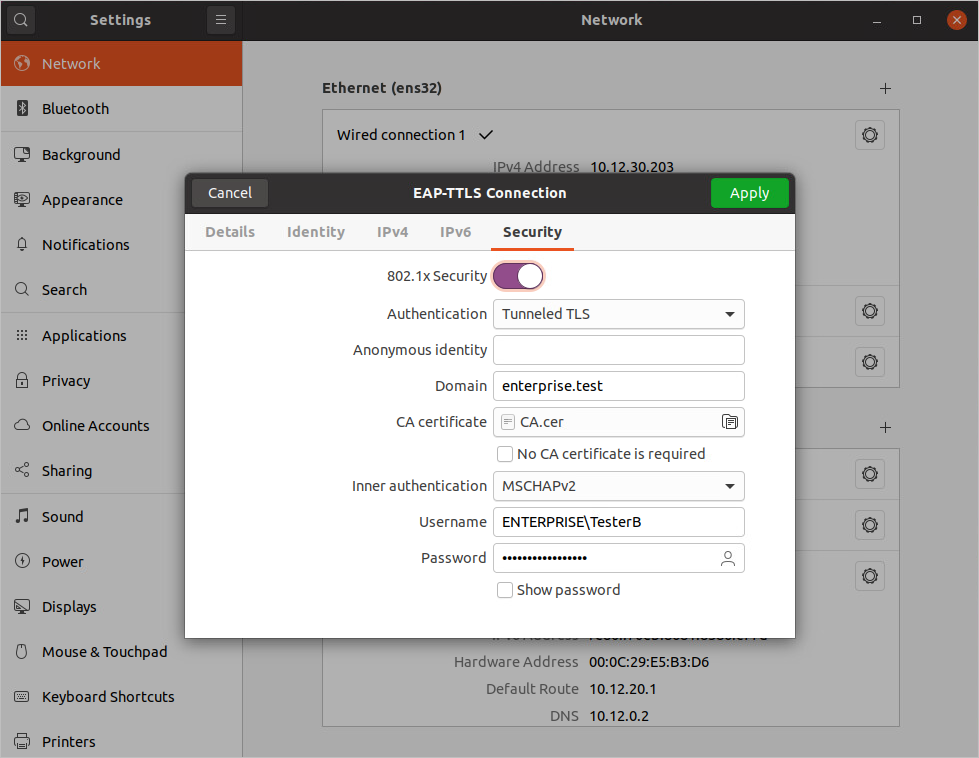
3.6. Complete the fields with the connection data and appropriate keys.
Info
To increase security, it is advisable to add a CA certificate.
3.7. In the Inner authentication field you need to select: MSCHAPv2. The MD5 option only works with local NACVIEW accounts.
3.8. Confirm with the Apply green button.
Info
You may need to enter your password again at the first time you connect.
Selection of configuration connection🔗
You can find previously created connection configurations by selecting the appropriate option from the drop-down menu in the upper right corner of the screen.